Today was one of those Sundays where all my pent-up energy and plans for cooking were finally realized! It's been a very busy last few weeks with the semester really starting to race to the finish, but today I got back to my traditional weekend batch of muffins which make a nice breakfast during the week - apple streusel muffins, wherein I actually successful made streusel for once! I usually overwork it and end up with cinnamon sugar butter...
Also got a little improvising going with chocolate chocolate-chip cookies! I took the standard Hershey's chocolate chip cookie recipe from the package of semisweet chips (which incidentally, is the only chocolate chip cookie recipe that I've found that makes chewy cookies!), and I subbed out 1/4 c of flour for cocoa, and put in 1/2 white chocolate chips and 1/2 semisweet. They're really good!
And then, since this is my week to cook, I had the Bavarian Beef Dinner marked for my next food share. Do you ever get the urge to sit down and read through some of your cook books? It doesn't strike me very often, but a couple of weeks ago I read through several cook books and marked recipes that sounded good (another interesting find: Mexican-style Chicken Kiev).
Bavarian Beef Dinner (Best of Country Cooking 1999):
2 lb boneless chuck roast, cubed (I bought extra lean stew beef = $10.75)
2 tbsp vegetable oil
1-1/2 c beef broth ($0.15)
2 med onions, sliced ($1.59)
1 garlic clove, minced ($0.05)
1 tsp each dill seed, caraway seed, paprika, salt
1/2 tsp pepper
(added mushrooms = $0.59)
1/4 c cold water
3 tbsp flour
1 c sour cream ($0.80)
egg noodles ($1.50)
Brown beef in oil. Add broth, onions, garlic, and seasonings. Cover and simmer for 2.5 hours, until beef is tender. Reduce heat. Combine water and flour until smooth; gradually stir into beef mixture. Cook and stir for 2 minutes. Add sour cream and heat through (do not boil). Serve over rice (or subbed egg noodles) with sauerkraut on the side.
I didn't include the sauerkraut in the tupperwares, although I do enjoy sauerkraut. The total for this meal was $15.63, coming in at $1.95 per serving!
Sunday, April 17, 2011
Sunday, April 10, 2011
A dinner party!
Last Monday Julie and Colby and Randi came over for dinner. Usually if I cook it's just for me, which means less incentive to make stuff that actually looks pretty and tastes good. But this time I got out a recipe and multiple pots and pans and made a meal for people, while still doing something fairly nice and simple: baked ziti!
It was an easy recipe - mostly pasta and cheese and tomato-y stuff. Mix it together, cover it with more cheese, and bake! The hardest part was chopping up the garlic. Anybody else find that difficult?
Straight out of the oven I think it tasted okay, but for some reason it was not as good after reheating. Maybe tomato sauce would have tasted better than the can of whole tomatoes. Or perhaps I could have crushed the tomatoes more so it would have mixed better with the cheese.
Also on the menu was stuff I didn't make so much as buy: mixed green salad, garlic bread (which I would like to try making myself sometime), and ice cream.
So, baking pasta and casserole-type stuff is fun. The dishes always comes out looking so hearty. I'll be attempting more similar things in the future!
Friday, April 1, 2011
Austin Bakes for Japan

Tuesday, March 22, 2011
Greens Soup

I've been working on an academic paper for the past 9 months or so. It's been rough going and one of the biggest problems I've faced is trying to figure out what exactly it is that I'm trying to tell people by writing this and using the university's money to get it published in a highly visible journal. After taking a few days to step back and ponder, I think I really understand the message I want to get across and this has allowed me to become more focused and efficient. I think the same goes for this blog.
What is the purpose for writing this? Is it to just share recipes that we've swapped, or should there be something more? Personally, I've used this to try to step up my game in terms of picture taking. I'm working on quality too, but even taking pictures has been a struggle for me over at my other food blog. Ahem. But there's more to this blog than just disseminating our culinary results. One of the main purposes here is to promote cooking at home. It doesn't matter if it's fancy or simple, but the act of controlling what goes in one's food allows the home cook to cater to specific tastes, maintain the nutritional integrity of a dish, and generally increase the quality of what one eats.
It's hard to always make time to cook. It seems that with busy lives and schedules, it's hard to sit down to eat, let alone start with a cupboard of ingredients. One thing that I've started to do more and more is making large batches and freezing the leftovers. The CSA that Colby and I belong to has been really greens heavy in the past. It's not a problem, but sometimes it's hard to use up all the produce before it goes bad. I've taken to blanching and freezing the greens for some later purpose. It wasn't until tonight that I finally put my first big batch in a dish. I also made way too many potatoes awhile back and froze those as well. Colby and I got home from work on the late side and I decided that I wanted something simple for dinner. This is what we came up with.
Greens soup
2 bunches greens, blanched or wilted (I used my freezer supply of swiss chard and spinach)
~1/2 lb potato, boiled (I used Yukon golds)
1 T extra virgin olive oil
1/2 onion, diced
1-2 cloves garlic, crushed
1 c stock
1/2 c milk
s+p, to taste
sour cream
In a medium-sized sauce pan, sweat the onions and a pinch of kosher salt in oil until they are translucent. ~5 minutes or so. Add in the crushed garlic and stir until fragrant ~30 s. Add in the greens, potatoes, milk, and stock. Cook until everything is heated through and then puree until smooth. Taste for seasoning. Serve with a dollop of sour cream.
Tuesday, March 15, 2011
Green Pie!
 It was late on Sunday night when I was overcome by a sudden, overwhelming urge to bake pie. Nothing else would do, it had to be pie! After all, I shortly realized, Tuesday was Pi Day (3.14), so it did in fact have to be pie. But not just pie, it had to be green pie, because this week is St. Patrick's Day too, and therefore green is a must.
This led to a google image search (sorted by color, mind you) of possibilities. It turns out there are only about 3 possibilities when you want a truly green pie. The first was grasshopper pie, a delicious blend of mint and chocolate, which happens to be one of my favorite flavor combos, but since I anticipated sharing my pie with my co-blogger Julie, who isn't much of a chocolate fan (I know, I've been demanding her woman card for that one), I opted against it. The next option I found was avocado pie. Ew. Blech. I don't like avocado, but for many reasons that just sounds gross. Enter Option #3, key lime pie! Perfect winner!
I came across this link in the process for Lemon Chiffon Pie. I thought this post was great. I have really enjoyed the Community Supported Home Cooking experience so far, especially contrasting my own cooking style with others'. That blog post is a perfect example of the differences between my personal cooking style and Julie's. Most of what I make is fairly quick, easy, and functional. It's not supposed to be pretty or refined, it's supposed to fill me up and taste good doing it. Julie's cooking is very often about style and refinement, with little to no shortcuts. Everybody has their own ways of doing things, I just thought this was a great moment to realize that everyone cooks for different reasons. Some people cook to express themselves and release their creativity, which sometimes I do, but usually for me cooking is a wholesome, enjoyable way of putting food in my belly.
The blog post alluded to a Key Lime Icebox Pie, which was perfect for my intentions, so I went for it. I always make my own graham cracker crust, but even better for certain situations is vanilla wafer crust (also, gingersnap crust is amazing). I have a standard recipe for graham cracker-like crusts, which I got out of my Philadelphia Cream Cheese Cheesecake Cookbook:
Dessert crust:
1 1/2 c. crushed cookies
3 tbsp sugar
1/3 c. butter (which always turn out too dry so I'd go with 6-7 tbsp)
Also, a personal cooking problem of mine: overenthusiastic use of vanilla. This recipe called for 1 tsp vanilla in the icebox pie. Being the enthusiast I am, I never measure vanilla with a proper measuring spoon. I just pour a little in the batter and call it good. Well, this time I went a little too far. There was definitely a blow-by-blow battle between the vanilla and lime juice for the leading role of this pie. It was still tasty, and satisfied my pie need, but I think I've finally come around to admitting my vanilla hubris.
Thursday, March 10, 2011
Meyer Lemon Sherbet
I finally found the recipe for the meyer lemon sherbet we made for our dinner party. I also discovered that I misread the recipe in the first place. Oops. It was still quite delicious, so here's both a link to the original recipe and what I ended up making
Meyer Lemon Sherbet
1/2 c meyer lemon juice
zest of 3 meyer lemons, very finely chopped if not using a microplane grater
1 c heavy cream
3/4 c whole milk
2/3 c granulated sugar
In a small sauce pan, combine the sugar and lemon juice and heat until the sugar is dissolved. Mix all the other ingredients, and refrigerate for at least 2 hours, though longer is better because the flavors can meld. Pour the mixture into a standard ice cream maker and once solid-er. Freeze for a couple hours to really set.
We served this with some really yummy blueberries and it was great. I love meyer lemons and this sherbet didn't disappoint!
Monday, March 7, 2011
Still Alive!
Okay, I admit that we've been a bit lax in our blogging lately, but that doesn't mean that we've been lax in cooking. The cooking always comes first and thank goodness it does! We've made some pretty tasty dishes over the past month and a half. The goal is to recap every other week, after we've finished a cycle. This time, I'll recap everything that we've made and starting in two weeks from now, it'll only be for the those items we cooked and links therein.
30 January
Athena - Asian-inspired chicken and rice casserole
Chalence - Chicken and Forty Cloves
Julie - Lasagna
Randi - Jambalaya
6 February
Athena - chicken and shrimp stir-fry
13 February
Chalence - Chicken Paprikash with Dumplings
Randi - False Alarm Chili
20 February*
Colby & Julie - Pot Roast with Root Vegetables, meyer lemon sherbet
Randi - Mexican Lasagna
27 February
Athena - Shepherd's Pie
Chalence - Curried Chicken with Noodles
6 March
Julie - Sriracha Salad with Chicken
Randi - Greek Salad and Hummus
On the 20th, we had our first CSHC dinner party. Colby insisted on cooking and came through with flying colors. He'll post about this soon. *AHEM*. Since this was a good forum for food that isn't easily transportable, I took the opportunity to use up some of my meyer lemon stash and made a quick sherbet. Recipe to follow when I can find where I hid it. :)
30 January
Athena - Asian-inspired chicken and rice casserole
Chalence - Chicken and Forty Cloves
Julie - Lasagna
Randi - Jambalaya
6 February
Athena - chicken and shrimp stir-fry
Julie - Tibetan Beef Dumplings, Kimchi and Turkey Mandu, and Lai Wong Bao
Chalence - Chicken Paprikash with Dumplings
Randi - False Alarm Chili
20 February*
Colby & Julie - Pot Roast with Root Vegetables, meyer lemon sherbet
Randi - Mexican Lasagna
27 February
Athena - Shepherd's Pie
Chalence - Curried Chicken with Noodles
6 March
Julie - Sriracha Salad with Chicken
Randi - Greek Salad and Hummus
On the 20th, we had our first CSHC dinner party. Colby insisted on cooking and came through with flying colors. He'll post about this soon. *AHEM*. Since this was a good forum for food that isn't easily transportable, I took the opportunity to use up some of my meyer lemon stash and made a quick sherbet. Recipe to follow when I can find where I hid it. :)
Attack of the Veggies! Part II.

As a Midwesterner, I'd be remiss to dismiss the wonderful nature of meat and potatoes, but echoing Randi's sentiments, sometimes you just need your vegetables. We both came to this conclusion separately this week and while Randi went to Greece, I found myself in Asia by way of Great Britain. And what I mean by that is that I gathered some inspiration from Nigella Express.
Nigella includes a recipe for an Asian-inspired salad using tom yum paste and bean sprouts. I had neither on hand and I kind of hate bean sprouts, so I modified the recipe to feed 8 people and include whatever I had lying around in my fridge. This recipe is super simple and involves little cooking. Mostly it's prep work and blanching, which I find strangely therapeutic.
Sriracha-inspired salad (Serves 8)
1/4 c rice wine vinegar
1/4 c extra virgin olive oil
1.5 T sesame oil
1 T honey
3-4 T sriracha (depending on how spicy you like things)
4 cloves garlic, peeled, boiled for ~5 minutes, and mashed
kosher or sea salt to taste
2 spring onions, sliced
2 cans baby corn, drained, rinsed, and chopped into bite sized pieces
~2 c red cabbage, sliced
broccoli florets from ~3 crowns, blanched for ~3 minutes
~1/2 lb green beans, blanched for ~2 minutes
4 chicken breasts, baked, cooled, and sliced
For the dressing: whisk together rice wine vinegar, EVOO, sesame oil, honey, sriracha, garlic, and a pinch of salt. Make sure the garlic is super mashed up. I actually pass the boiled garlic through the garlic press. Taste and season if necessary. Or add more sriracha because you're obsessed. I won't judge. :)
To blanch: bring a large pot of water to boil with a lot of kosher salt. As Thomas Keller says, it should taste like the sea. Once you get a rolling boil, add in the vegetable of choice to blanch for the prescribed amount of time. Different vegetables take different amounts of time. Remove the vegetable from the water and immediately shock in an ice bath to stop the cooking process.
To assemble: Toss everything in a large bowl.
This definitely gets better with age. The other awesome thing about this recipe is that you can sub in whatever vegetables you have on hand. I've made this a couple times now just for myself and I've used spinach instead of red cabbage and leeks instead of spring onions. It's all very flexible and no matter what, pretty much anything is delicious when it's coated with the sriracha dressing.
Attack of the Veggies! Part I.
 |
| From Doodle-A-Day |
Or, how eating meat centered leftovers for a few weeks will cause massive cravings for fresh vegetables...
Or, how a wimpy Austinite craves summer and this is the next best thing...
We've had lots of great dishes exchanged, but I'm pretty sure all of them have revolved around meat, many times with a paired starch, such as noodles, mashed potatoes, etc. These are all wonderful, but sometimes I'm just dying for a veggie meal to make me feel balanced. Enter, Greek night! Tonight I made my own fresh hummus and Greek salad. (Actually, I had my hummus-God boyfriend make the hummus, but I soaked and cooked the chickpeas!)

----------------------
Greek salad:
4 cucumbers = $2.72
2 bags cocktail tomatoes = $6.94
1/2 red onion = $0.88
1/3 jar kalamata olives = $1.50
8 oz feta = $3.98
splash EVOO
salt, Greek seasoning
total salad: $16.25 (8 servings, $2.03/serving)
hummus:
16 oz bag dried chickpeas = $1.00
1/4 jar tahini (about 1/2 c) = $1.25
4 cloves garlic = $0.10
lemon juice
EVOO
salt, cumin, garam masala, cayenne etc from the cupboard
Soak the chickpeas overnight, then cook them in the crockpot on low for 12 hours (or possibly somewhat less, but that's when I got home from work). Drain. Throw everything in a food processor. Adjust seasonings to taste.
Total hummus: $2.50 (makes 32 oz!, so at least 16 servings=$0.16/serving=damn cheap!!!)
1 pita bread for dipping = $0.42
-------------------------
Even with the slightly more expensive salad, I'd like to see you get a fresh, delightful meal like that for < $3 when eating out! What can I say...cooking well and saving money makes me very proud of myself.
Sunday, March 6, 2011
Lasagna-inspired Mexican casserole
Not long ago, Julie wowed us with her homemade lasagna! I've had a hankering for Mexican food lately, and since everyone is always underwhelmed by the spiciness of my dishes (false alarm chili), I made an effort this time to spice it up to the edge of my comfort level. This dish was ridiculously easy to make, and also quite cheap!
-------------------
Taco-layer casserole (aka Randi throwing random Mexican ingredients in a 13x9 pan):
1/2 package corn tortillas (1 pack=$1.14, so $0.57)
1 can refried beans ($0.69)
2 lbs. ground beef ($4.76)
homemade taco seasoning, see below
1 can Hatch Tex-Mex diced tomatoes & green chilies ($0.50)
1/2 jar salsa ($1.99/2=$1)
1 pack shredded cheddar ($1.95)
one tomato, diced ($0.38)
1 c. sour cream ($1.22)
I found this a long time ago and have used it religiously ever since. I almost never keep the taco seasoning packets on hand, but I always have the ingredients to throw together taco seasoning, plus you can modify this to your personal taste. I like lots of cumin!
In a small bowl, mix together the homemade taco seasoning:
2 tsp onion powder
2 tsp cumin
1 tsp garlic powder
1 tsp paprika
1 tsp oregano
1 tsp sugar
1/2 tsp salt
chili powder to taste
Preheat oven to 350 (because I hate recipes that don't tell you to preheat, and then I get all the way to the end with everything assembled, and realize I have to wait 5 min for my oven to heat).
In a large pan, brown ground beef, draining the fat afterward. Mix in the homemade taco seasoning and the can of Hatch tomatoes. Set aside.
In 13x9 pan, layer corn tortillas, refried beans, seasoned beef, salsa, and 1/2 package shredded cheese. Repeat layers without cheese. Top with tortillas, sour cream, diced tomatoes, and rest of shredded cheese. Bake for 30 min, until warmed through and cheese is melted. 8 servings.
-----------------
This was just at the border of my tolerable spiciness where I was still able to truly enjoy the meal, although I think the spiciness faded a little with time. I ate mine with tortilla chips to reign in the spice a bit. The Hatch chilies are amazing, but their availability is tied to central Texas, so in a pinch you can substitute Rotel tomatoes and chilies, which will have slightly different seasonings.
I listed the costs per item above, but the final total comes to $11.07, which is $1.38 per serving. Stop and think about that. You could easily go out to eat and spend that on one meal. For the same price, you can feed 8 people (or yourself 8 times)!
Thursday, February 17, 2011
Asian Dumplings Part I
There's something about dumplings that everyone loves. This is especially true for filled dumplings. There are so many varieties across the US and around the globe, it's hard to pick a favorite. There are pasties and pierogies and empanadas. For our first foray into community dumplings, I turned to Asia because it was close to the Chinese New Year and because I have this amazing book:

I've made several recipes out of Asian Dumplings: Mastering Gyoza, Spring Rolls, Samosas, and More by Andrea Nguyen, but never before for a crowd. I made three types of dumplings: Tibetan beef and Sichuan peppercorn, kimchi mandu, and lai wong bao. The kimchi mandu and the Tibetan dumplings will be in a future post, but today I'll explain how to make your very own lai wong bao from scratch.
First, what exactly *are* lai wong bao? Bao is a Chinese filled dumpling. The dough is bread-y and made with yeast and usually they're steamed. Lai wong bao are egg custard buns, which are sweetened and a perfect dessert. They're often found in dim sum restaurants served alongside barbecue pork buns and other similarly steamed items.
It's easy to find prepared wonton or spring roll skins in the supermarket, but since these are made from a bread-like dough, it's easier to make them at home.
Bao dough for 32 dumplings (adapted from Asian Dumplings)
1.5 t instant yeast OR scant 2t dry active yeast
3/4 c lukewarm water (no hotter than 120 F)
2 T oil (I used canola, but another neutral oil would work here)
12 1/2 oz low gluten AP flour (Gold Medal works well, King Arthur does not)
2 T granulated sugar
2 t baking powder
1/2 t (kosher) salt
Combine the yeast and water and set aside for a minute. Add in the canola oil and whisk to dissolve. Let the mixture sit for 5 minutes. Meanwhile, whisk the flour, sugar, baking powder, and salt together in a large bowl. Make an indentation in the center of the bowl, and pour in the yeast mixture. With a well oiled spatula, mix in the dry ingredients to the well. I find it easier to mix in the flour from the edges (as per Andrea Nyguen's advice) to make sure that all the flour gets incorporated. Keep stirring until the dough mostly comes together, but is still a bit ragged. Knead the dough until it all comes together smoothly. It shouldn't need any more flour or water. When you press it, it should be slightly sticky, but release easily and spring back, leaving a small indentation. If the dough seems too wet or too dry add more flour by the ~1/2 teaspoonful or more water by the ~1/2 teaspoonful. Prepare a clean bowl by rubbing the inside all over with oil. Let the dough rise in this bowl in a warm place for at least 30 minutes, or when the dough doubles in size.
While you're waiting for your dough to rise, make the custard filling.
Egg custard filling (Adapted from food.com recipe here)
2 large eggs
20 g Bird's custard powder*
200 g granulated sugar
100 g wheat starch flour**
100 g butter
In a small pot, heat milk. Add in the sugar, wheat starch flour, and custard powder and whisk to combine. Add in the butter and when melted, remove the pot from the heat and temper in the two eggs. Bring the mixture back to the heat and allow it to thicken. Don't worry if it gets kind of lumpy. I used my immersion blender to smooth it out. Once thickened (should be like paste consistency), allow the mixture to cool.
To form the wrappers, take the dough and cut it in half, then cut that dough in half. Put 3/4 of the dough back in the oil bowl and keep covered. Roll the remaining dough out into a long and even tube. Cut this in half, and then cut those in half, and then cut everything in half again. You'll end up with eight pieces. Take one of the pieces and roll it into a sphere in your hand. Using either a small rolling pin or some other narrowish cylinder (I actually used the glass tube that my vanilla beans came in), roll out the dough into a circle. I do this by constantly rotating the dough every time I roll it. Once it gets to ~3 inches in diameter, add in about a tablespoon or so of the custard filling and seal the dough. The way I do this, which is probably the trickiest part, is to take opposite sides of the dough and then pinch them together.
After placing the filling in the center of the dumpling, pinch together the west and east ends of the dough. It'll look something like a taco at this point. Since you've made the dough from scratch, it'll stick to itself wonderfully. Now attach north and south. At this point, it sort of looks right, but you need to get those pesky ordinal directions sealed too. Merge together Maine and California erm... NW and SW and then NW and SE. Once all your corners are sealed, take the top and twist. Place each bun on a small piece of parchment paper or in a cupcake liner, if you're feeling lazy. ;) Proof the buns in a warm area for 15 minutes at least.
To cook these bad boys, steam them for ~10 minutes, or until the dough is cooked. In dim sum restaurants, these buns are snow white. If you use traditional all purpose flour, the buns will definitely not be all white. This is okay, though, because they will still be extremely tasty.
I've listed the recipe in units of mass. I have a small kitchen scale that I bought for 20 bucks and I like using it for baking applications where it's a science and not an art. If you don't like doing these measurements by weight, here's a way to convert *some* things. In general, 1 c of ALL PURPOSE flour is ~5 oz by weight. Different flours have different conversions, so proceed with caution.
*Bird's custard powder is available at specialty stores. I can find it at Central Market in Austin, and I've also found it at World Market (which is apparently called Cost Plus in other parts of the country). It's apparently big in the UK, but it's a lot like pudding. You can substitute a vanilla instant pudding, though it won't be exactly the same and you'll have to play with the amount of sugar you use.
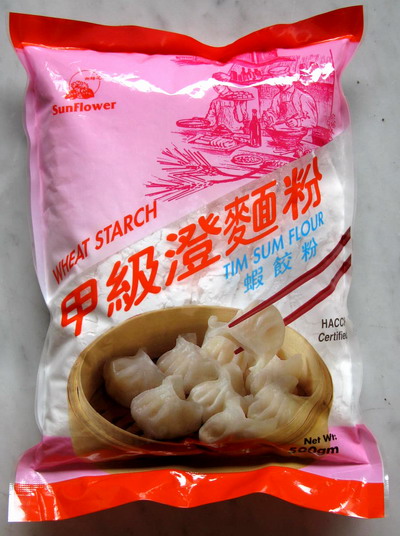
**Wheat starch flour can be found in Asian grocers (and known as tung min flour) or probably even in the Asian grocery section of your local friendly megamart. This is *not* the same as wheat flour. It's white and looks a lot like corn starch and sticks to everything, so measure carefully. ;)
I've made several recipes out of Asian Dumplings: Mastering Gyoza, Spring Rolls, Samosas, and More by Andrea Nguyen, but never before for a crowd. I made three types of dumplings: Tibetan beef and Sichuan peppercorn, kimchi mandu, and lai wong bao. The kimchi mandu and the Tibetan dumplings will be in a future post, but today I'll explain how to make your very own lai wong bao from scratch.
First, what exactly *are* lai wong bao? Bao is a Chinese filled dumpling. The dough is bread-y and made with yeast and usually they're steamed. Lai wong bao are egg custard buns, which are sweetened and a perfect dessert. They're often found in dim sum restaurants served alongside barbecue pork buns and other similarly steamed items.
It's easy to find prepared wonton or spring roll skins in the supermarket, but since these are made from a bread-like dough, it's easier to make them at home.
Bao dough for 32 dumplings (adapted from Asian Dumplings)
1.5 t instant yeast OR scant 2t dry active yeast
3/4 c lukewarm water (no hotter than 120 F)
2 T oil (I used canola, but another neutral oil would work here)
12 1/2 oz low gluten AP flour (Gold Medal works well, King Arthur does not)
2 T granulated sugar
2 t baking powder
1/2 t (kosher) salt
Combine the yeast and water and set aside for a minute. Add in the canola oil and whisk to dissolve. Let the mixture sit for 5 minutes. Meanwhile, whisk the flour, sugar, baking powder, and salt together in a large bowl. Make an indentation in the center of the bowl, and pour in the yeast mixture. With a well oiled spatula, mix in the dry ingredients to the well. I find it easier to mix in the flour from the edges (as per Andrea Nyguen's advice) to make sure that all the flour gets incorporated. Keep stirring until the dough mostly comes together, but is still a bit ragged. Knead the dough until it all comes together smoothly. It shouldn't need any more flour or water. When you press it, it should be slightly sticky, but release easily and spring back, leaving a small indentation. If the dough seems too wet or too dry add more flour by the ~1/2 teaspoonful or more water by the ~1/2 teaspoonful. Prepare a clean bowl by rubbing the inside all over with oil. Let the dough rise in this bowl in a warm place for at least 30 minutes, or when the dough doubles in size.
While you're waiting for your dough to rise, make the custard filling.
Egg custard filling (Adapted from food.com recipe here)
2 large eggs
20 g Bird's custard powder*
200 g granulated sugar
100 g wheat starch flour**
200 mL milk
100 g butter
In a small pot, heat milk. Add in the sugar, wheat starch flour, and custard powder and whisk to combine. Add in the butter and when melted, remove the pot from the heat and temper in the two eggs. Bring the mixture back to the heat and allow it to thicken. Don't worry if it gets kind of lumpy. I used my immersion blender to smooth it out. Once thickened (should be like paste consistency), allow the mixture to cool.
To form the wrappers, take the dough and cut it in half, then cut that dough in half. Put 3/4 of the dough back in the oil bowl and keep covered. Roll the remaining dough out into a long and even tube. Cut this in half, and then cut those in half, and then cut everything in half again. You'll end up with eight pieces. Take one of the pieces and roll it into a sphere in your hand. Using either a small rolling pin or some other narrowish cylinder (I actually used the glass tube that my vanilla beans came in), roll out the dough into a circle. I do this by constantly rotating the dough every time I roll it. Once it gets to ~3 inches in diameter, add in about a tablespoon or so of the custard filling and seal the dough. The way I do this, which is probably the trickiest part, is to take opposite sides of the dough and then pinch them together.
 |
| just pretend this is well drawn, mkay? |
To cook these bad boys, steam them for ~10 minutes, or until the dough is cooked. In dim sum restaurants, these buns are snow white. If you use traditional all purpose flour, the buns will definitely not be all white. This is okay, though, because they will still be extremely tasty.
I've listed the recipe in units of mass. I have a small kitchen scale that I bought for 20 bucks and I like using it for baking applications where it's a science and not an art. If you don't like doing these measurements by weight, here's a way to convert *some* things. In general, 1 c of ALL PURPOSE flour is ~5 oz by weight. Different flours have different conversions, so proceed with caution.
*Bird's custard powder is available at specialty stores. I can find it at Central Market in Austin, and I've also found it at World Market (which is apparently called Cost Plus in other parts of the country). It's apparently big in the UK, but it's a lot like pudding. You can substitute a vanilla instant pudding, though it won't be exactly the same and you'll have to play with the amount of sugar you use.
**Wheat starch flour can be found in Asian grocers (and known as tung min flour) or probably even in the Asian grocery section of your local friendly megamart. This is *not* the same as wheat flour. It's white and looks a lot like corn starch and sticks to everything, so measure carefully. ;)
Monday, February 14, 2011
Happy Valentine's Day!

Thursday, February 10, 2011
Cooking on the Cheap

- frozen chicken (5 pieces) ~ $1.50
- smoked sausage, from Dad
- 3 bell peppers, $1.92
- 1 onion, $0.88
- 5 cloves garlic, $0.25???
- 1 can stewed tomatoes, $0.69
- chili powder + cayenne pepper, ~$0
- 1 tsp worchestershire, $0.25???
- 5 bay leaves, $0.50???
- tomato paste, $0.70???
- white rice, $0.50
total: $7.19, ($0.89 per serving)
Over the course of the last couple of weeks, I've found that my average is $1 or less per meal, which makes it sound like I live entirely off of mac 'n cheese, but I actually think I eat quite well. For the most part, my groceries are all ingredients. I buy very little prepackaged food, so what I make is more healthy than most alternatives (even when occasionally it is fried chicken...mmmm).
Now, I'm a huge believer in wasting as little food as possible. The jambalaya recipe called for me to boil the chicken and sausage together and use the broth to cook the rice. When I was done with the recipe, I still had a gallon of broth that didn't end up in the final jambalaya. Why throw out that yummy, smoky chicken broth when I could use it as a base for chicken soup? So earlier this week, I busted out the broth and made some chicken soup, which went great with my crackling fire for the cold weather. Here's another example of a tasty, cheap meal.
 |
| Smokey chicken broth = money in the bank! |
- free broth from jambalaya
- 1/2 onion ($0.43)
- 3 stalks celery ($0.25?)
- 3 carrots ($0.44)
- 2 chicken thighs ($1.33)
- 3 boullion cubes ($0.36)
- 1/3 bag macaroni ($0.30)
- spices (salt, pepper, sage), ~$0.10
Total = $3.21, or $0.40 per serving
This experiment of keeping track of my eating expenses has really reinforced my reluctance to eat out. How can I really justify spending $10+ on a single meal, when that could feed me for 3.3 days? Not to mention that I definitely eat more healthy food when I eat at home. Moral of the story? Cook more, from raw ingredients = healthier, happier, thriftier!
Sunday, February 6, 2011
Year of the Rabbit
 |
| from http://disney-clipart.com |
Initially, the plan was to cook every other weekend and everyone would bring their dishes all at once. We quickly discovered that there is almost no refrigerator space at the office, so this was less than ideal. We decided to switch it up and this week, which was supposed to be the "off" week, Athena and I will make dishes and the week after, Randi and Chalence will go. This lets us have a more continuous flow of dishes. I'm sure that over time, our system will morph to become more efficient, but we'll always update the about section, for everyone who's interested.
Athena's plan is to make a healthy stir-fry, which will be a nice reprieve from all of the deep fried Superbowl snacks. In celebration of the Chinese New Year, I'm making dumplings. The Asian Dumplings book by Andrea Ngyuen has been one of my go to cookbooks ever since I bought it a year and a half ago. I'll be making Tibetan beef and Sichuan peppercorn dumplings, kimchi mandu, and lai wong bao. Recipes and pictures to come!
Monday, January 31, 2011
Lazy Sunday Lasagna
In many ways, home cooking is vastly superior to anything you'll ever find at a restaurant. For starters, it's not nearly as expensive, you can control all the ingredients that get put in your meal, and no one will judge you for eating dinner in pajamas. So why is it that home cooking is becoming a lost art? For some it might be that they feel they lack the skills to cook something they can simply buy, for others it might be that watching someone cooking TV is way more entertaining than doing it themselves. I know that a lot of times when I find myself grabbing some take out, it's because I don't feel I have the time, between work and school. However, when I take the time to remind myself that I actually like to cook, I can usually find time to make a meal that, in the end, is much more satisfying than anything I'll ever eat from a carton.
To kick off our project, I wanted to make something that was soulsatisfyingly delicious and was easy to share. I could think of no better dish than lasagna. Not just any lasagna, mind you. One with an herby sauce that is meant for garlic bread. It's not a quick meal, but it's fairly easy to assemble and it's always delicious. *This is a perfect project for Sundays, when you don't want to return to work the next day, but want to feel "productive".
 |
| See? Herbs! |
Lazy Sunday Lasagna
1 lb lasagna noodles, boiled in salted water for 4 minutes and then removed (I used de cecco)
Sauce
1 lb mild Italian sausage
1.T bacon grease
2 T extra virgin olive oil
1 medium yellow onions, diced
6-8 cloves garlic, finely minced or crushed
1/2 lb crimini mushrooms, diced
2 28-oz cans stewed tomatoes (I used whole tomatoes, but I stick blendered one can smooth)
1.5 T dried basil
1.5 T dried parsley
1 t dried oregano
1 t dried sage
1 t dried thyme
1 t crushed red pepper flakes
salt+pepper to taste
layering cheese
16 oz ricotta cheese, drained
1 large egg, gently beaten
1/4 c basil pesto (This is a great place to start for homemade pesto)
1/4 c Parmesan cheese
salt+pepper to taste
1/3 c Parmesan cheese, grated
16 oz mozzarella cheese
To make the sauce, saute the mushrooms in the bacon grease until golden in a large stock pot. Remove mushrooms once cooked. Add in the Italian sausage and cook thoroughly. Remove the cooked sausage from the pot, add in the olive oil, and sweat the onions with a large pinch of kosher salt until translucent, about 5-10 minutes. Add in the garlic and stir for ~30 seconds, or until fragrant. Add the tomatoes, herbs, sausage, and mushrooms and bring to an almost boil. Simmer for at least 30 minutes. This sauce is meant to be cooked, so use this to your advantage to let the flavors mingle.
Mix together the ricotta cheese, Parmesan cheese, and pesto. Season with salt+pepper and taste for seasoning. Once you're satisfied, add in the egg and mix to combine.
Preheat the oven to 375. In a large casserole dish, ladle in about 12 oz of the sauce (my ladle is 6 oz, so this is two full ladles) and spread to coat. Place down your lasagna noodles. In my casserole, I can fit 3.5 noodles, so I used kitchen shears to cut one noodle in half. Add in 1/3 of the ricotta mixture. Use a spatula to spread the cheese evenly. Evenly spread ~6 oz of sauce over the ricotta mixture and then top with 1/2 c mozzarella cheese. Repeat two more times. Put on your top layer of noodles and then ladle on ~12 oz of sauce. Cover with the remaining mozzarella and 1/3 c of Parmesan cheese. Cover tightly with foil and bake in the oven for 20 minutes. Remove the foil and bake for another ~10 minutes or so, or until the cheese looks completely melted. Allow the lasagna to "rest" for at least 10 minutes before cutting into it.
I wanted to have a little twist on my usual recipe since this was the first meal that we'd all be sharing so I added pesto to the mix.
So, in short, it's not at all impossible to turn these

into this:

Sunday, January 30, 2011
Jambalaya
This week I made a huge pot of jambalaya (recipe here) featuring smoked sausage that my dad smoked himself. Yum! It turned out really nice, and I think it should have general appeal, but two disclaimers: (1) I'm a wuss, so it's not very spicy, and (2) keep an eye out for bay leaves! I didn't fish them all out, so there will be some floating in your portions.
I hope you like it!
-Randi
I hope you like it!
-Randi
Subscribe to:
Posts (Atom)